
I like reverse engineering stuff. It’s not just the fact that it’s a nice puzzle to solve, but I enjoy the thrill of “Oh, that’s how that works.” I’m sure I’m not alone, as can be clearly seen following marcan’s Asahi Linux work, or following Foone on Twitter, or Big Clive on YouTube (and many, many others).
Sometimes, a lot more rarely, my reverse engineering is actually geared towards something I want to make use of, rather than just for the sake of finding answers — this is one of those cases. If you have been following me on Twitter or decided to watch me work on this live on Twitch, you probably already know what I’m talking about. If not, be warned that this is going to be the first part of a (possibly long) series of posts on the same topic. It turned out to be very long for a single post, and I decided to split it instead.
You see, when we moved from the last apartment, we sold our Nest smart thermostat to a friend. The new apartment has an aircon system with heat pump, rather than a “classic” heating system, which is really important as the balcony can easily reach 40°C in the mornings when the sun shines. And unlike in the US, where thermostats are pretty much standardized, Europe’s landscape of thermostats is different enough that Nest gave up, and does not support aircon systems.
Aside: I do have a bit of a rant about Nest Thermostats in Europe, but some of that might be a bit tricky to phrase for me without risking breaching confidentiality with my previous employer, which I don’t want to do. So I will leave a question here for European Nest Thermostats users: can you finally enable hot water boost with the Google Home app?
To be honest, this also kind of makes sense: in a flat that is cooled and heated with an HVAC, it makes sense to have multiple thermostats so that each room can set a different required temperature. If we’re spending the evening in the living room, what’s the point of heating up the bedroom? If I’m on vacation and not spending time in the office, why would I turn on the air conditioning? And so on.
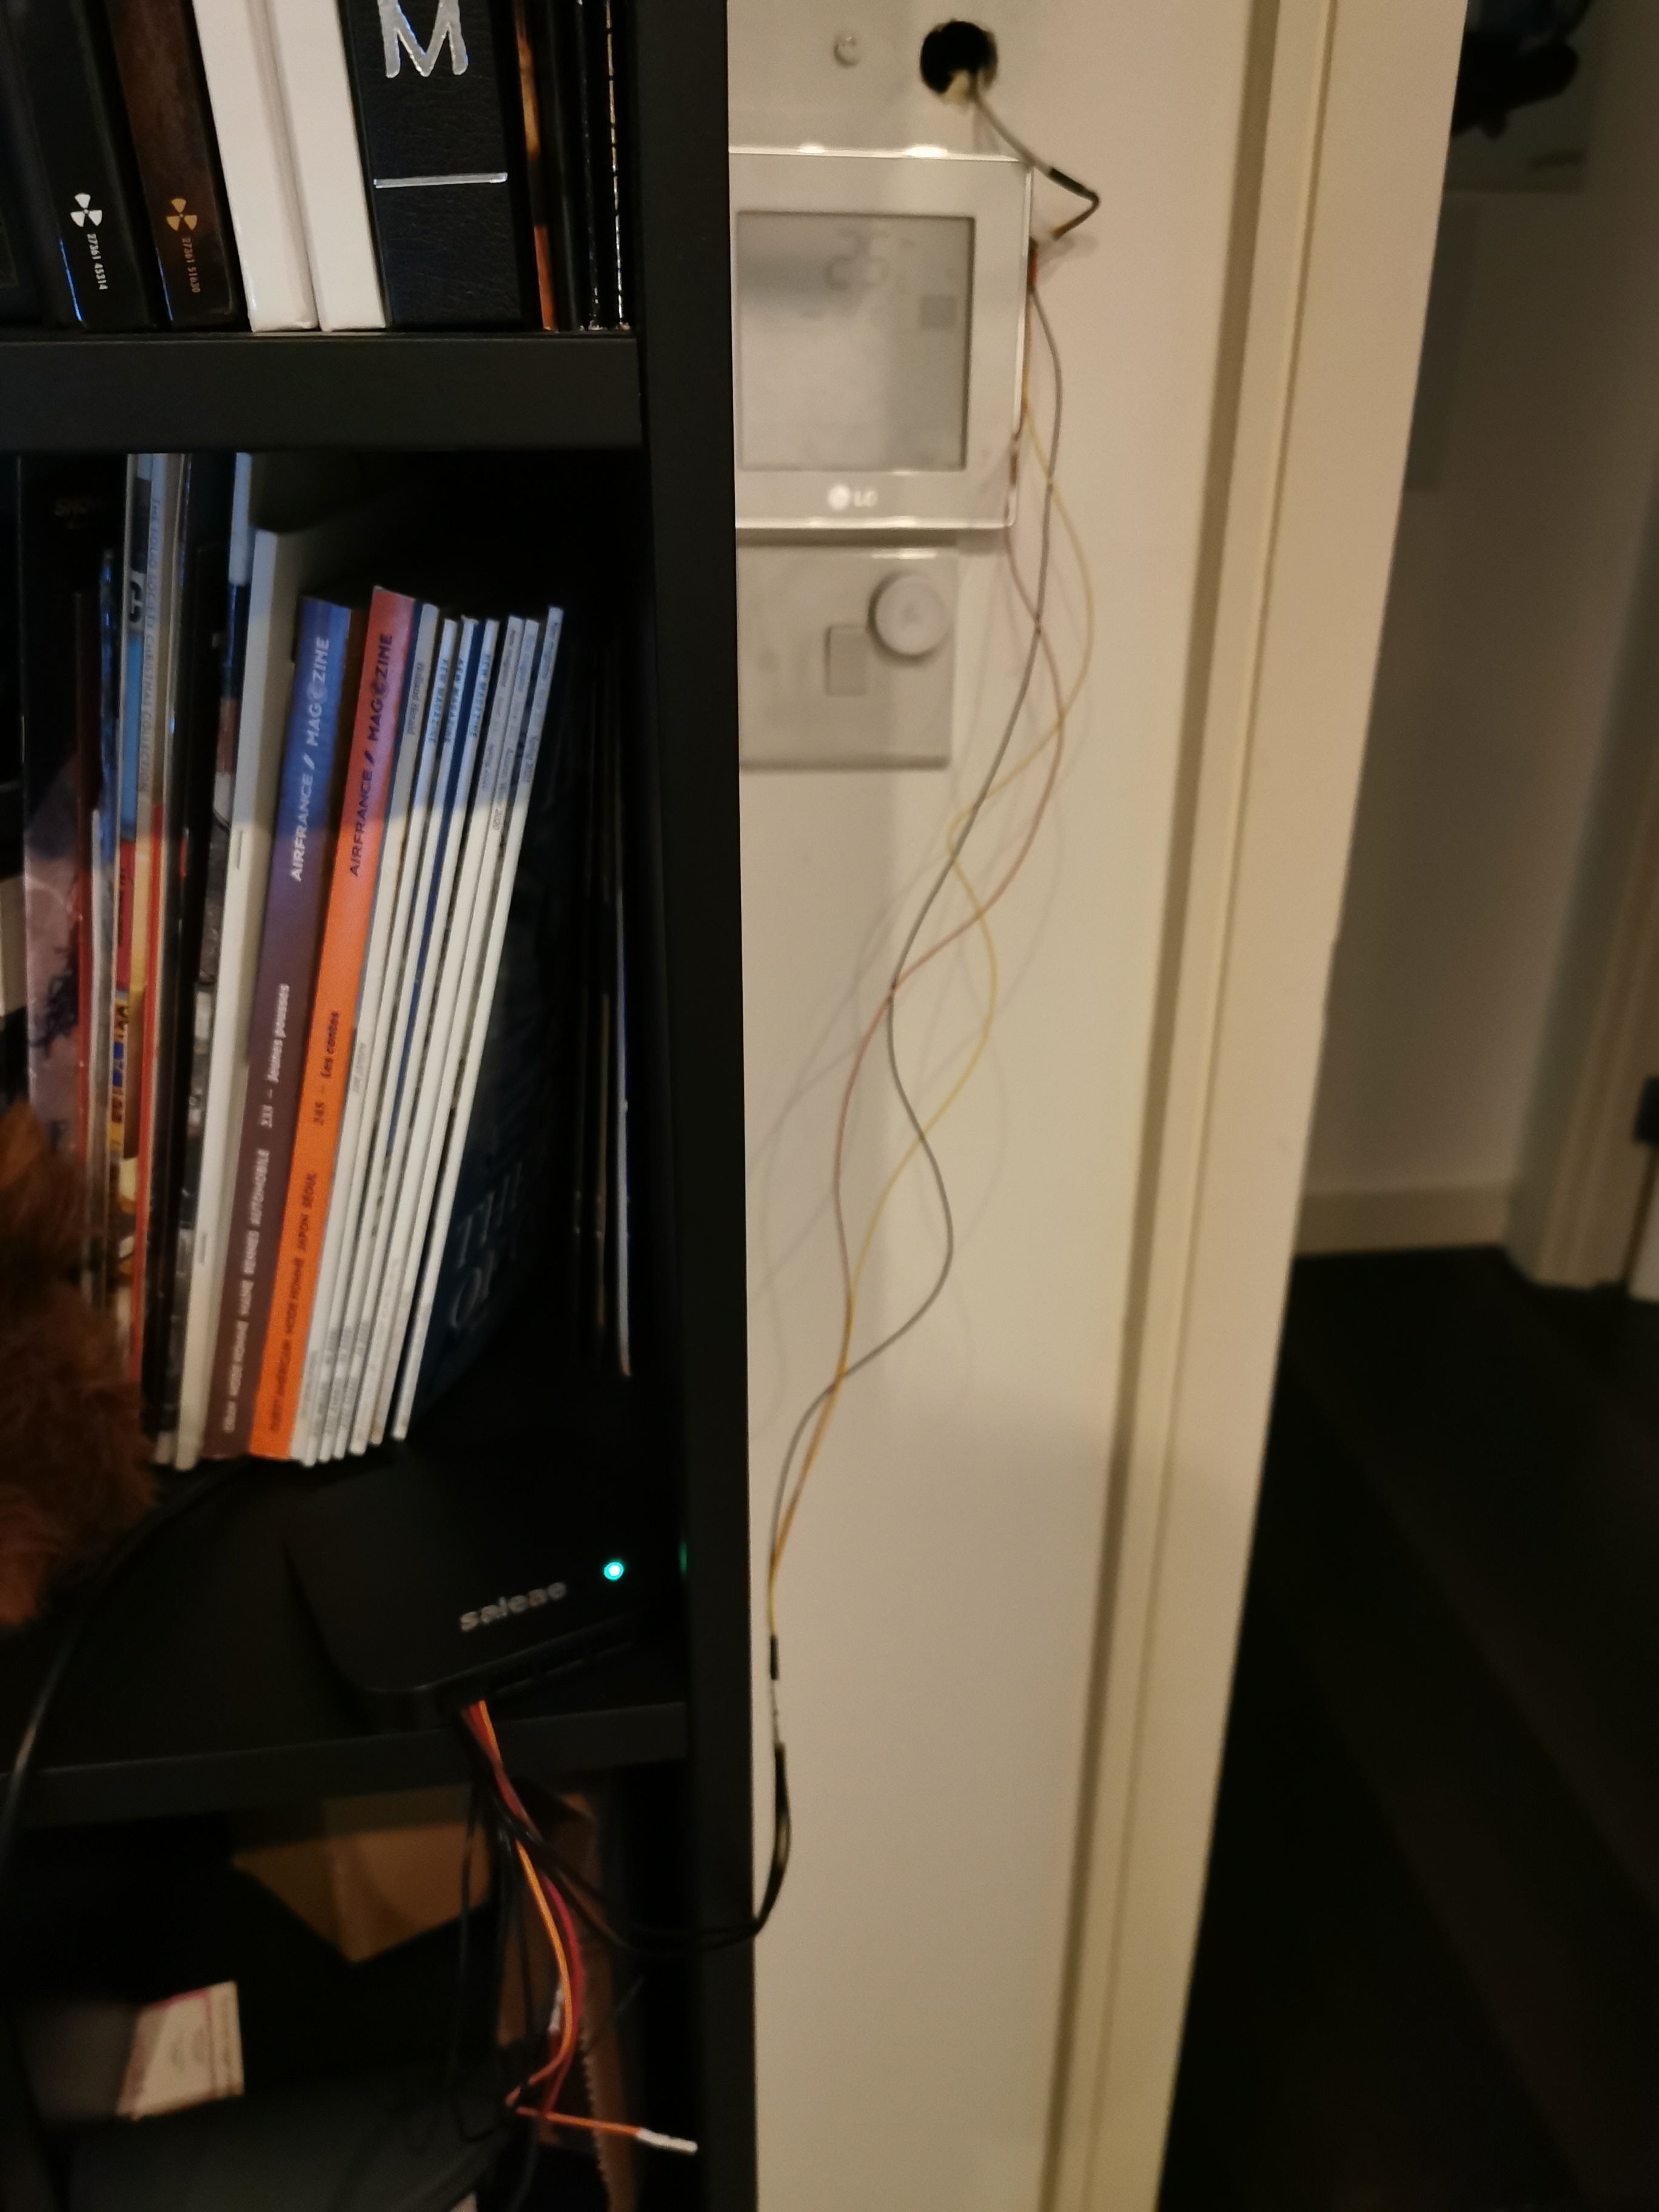
Unfortunately what we ended up with is three thermostat units from LG, model number LG-PQRCUDS0 (provided for ease of searching and finding this blog post), which are definitely not smart, and also not convenient. These are wired, non-smart control panels, that do support features like timing, but do not provide any way to control without tapping on the screen. As far as I know, these are configured to read a temperature sensor that is not on the panel itself, but on the other hand, the placement of those sensors are a bit on the unfortunate side: in particular in the bedroom it appears located in a position that is too natural to fit a wardrobe in, making it register always a higher temperature that the room actually has.
This had been particularly annoying during the winter but it was proving to be worse during the summer: as I said the temperature in the balcony can reach 40°C in the morning, as we’re facing east and it’s a all-glass external wall. That means that the temperature inside the apartment can easily reach 30°C quite suddenly. This is not good for electronics already, but it’s doubly non-good for things like food and medicine, including insulin, which I very much depend on.
While we could just try leveraging the timer mode to turn on the AC in the morning, the complication of where the sensor is makes it very hard to judge the temperature to set it at. And since, as Alec points out on the video, the thermostat’s job is only to turn something on or off (in theory, at least)… well, there has to be an easier way.
So I embarked in this quest of reverse engineering my aircon control panel, with the intent of introducing an ESPHome-compatible add-in that would allow me to control the HVAC through Home Assistant.
Inspection
The first thing to do when setting off to reverse engineer something is to figure out what it is, whether there is any documentation for it, and whether someone else already reverse engineered it. The model number, as I said, is LG-PQRCUDS0 and LG has user and installation manuals online describing it a Delux Wired Remote Controller (together with the -B and -S variants of the part number).
Reverse image search for the panel actually seemed to struck gold at first, as this Instructables post showed exactly the same UI as mine, and included a lot of information about the protocol. But also the comments pointed to a couple of different models that seemed all similar but a bit different. So instead of going ahead and trying to build the already reversed protocol I wanted to confirm how it all worked myself.
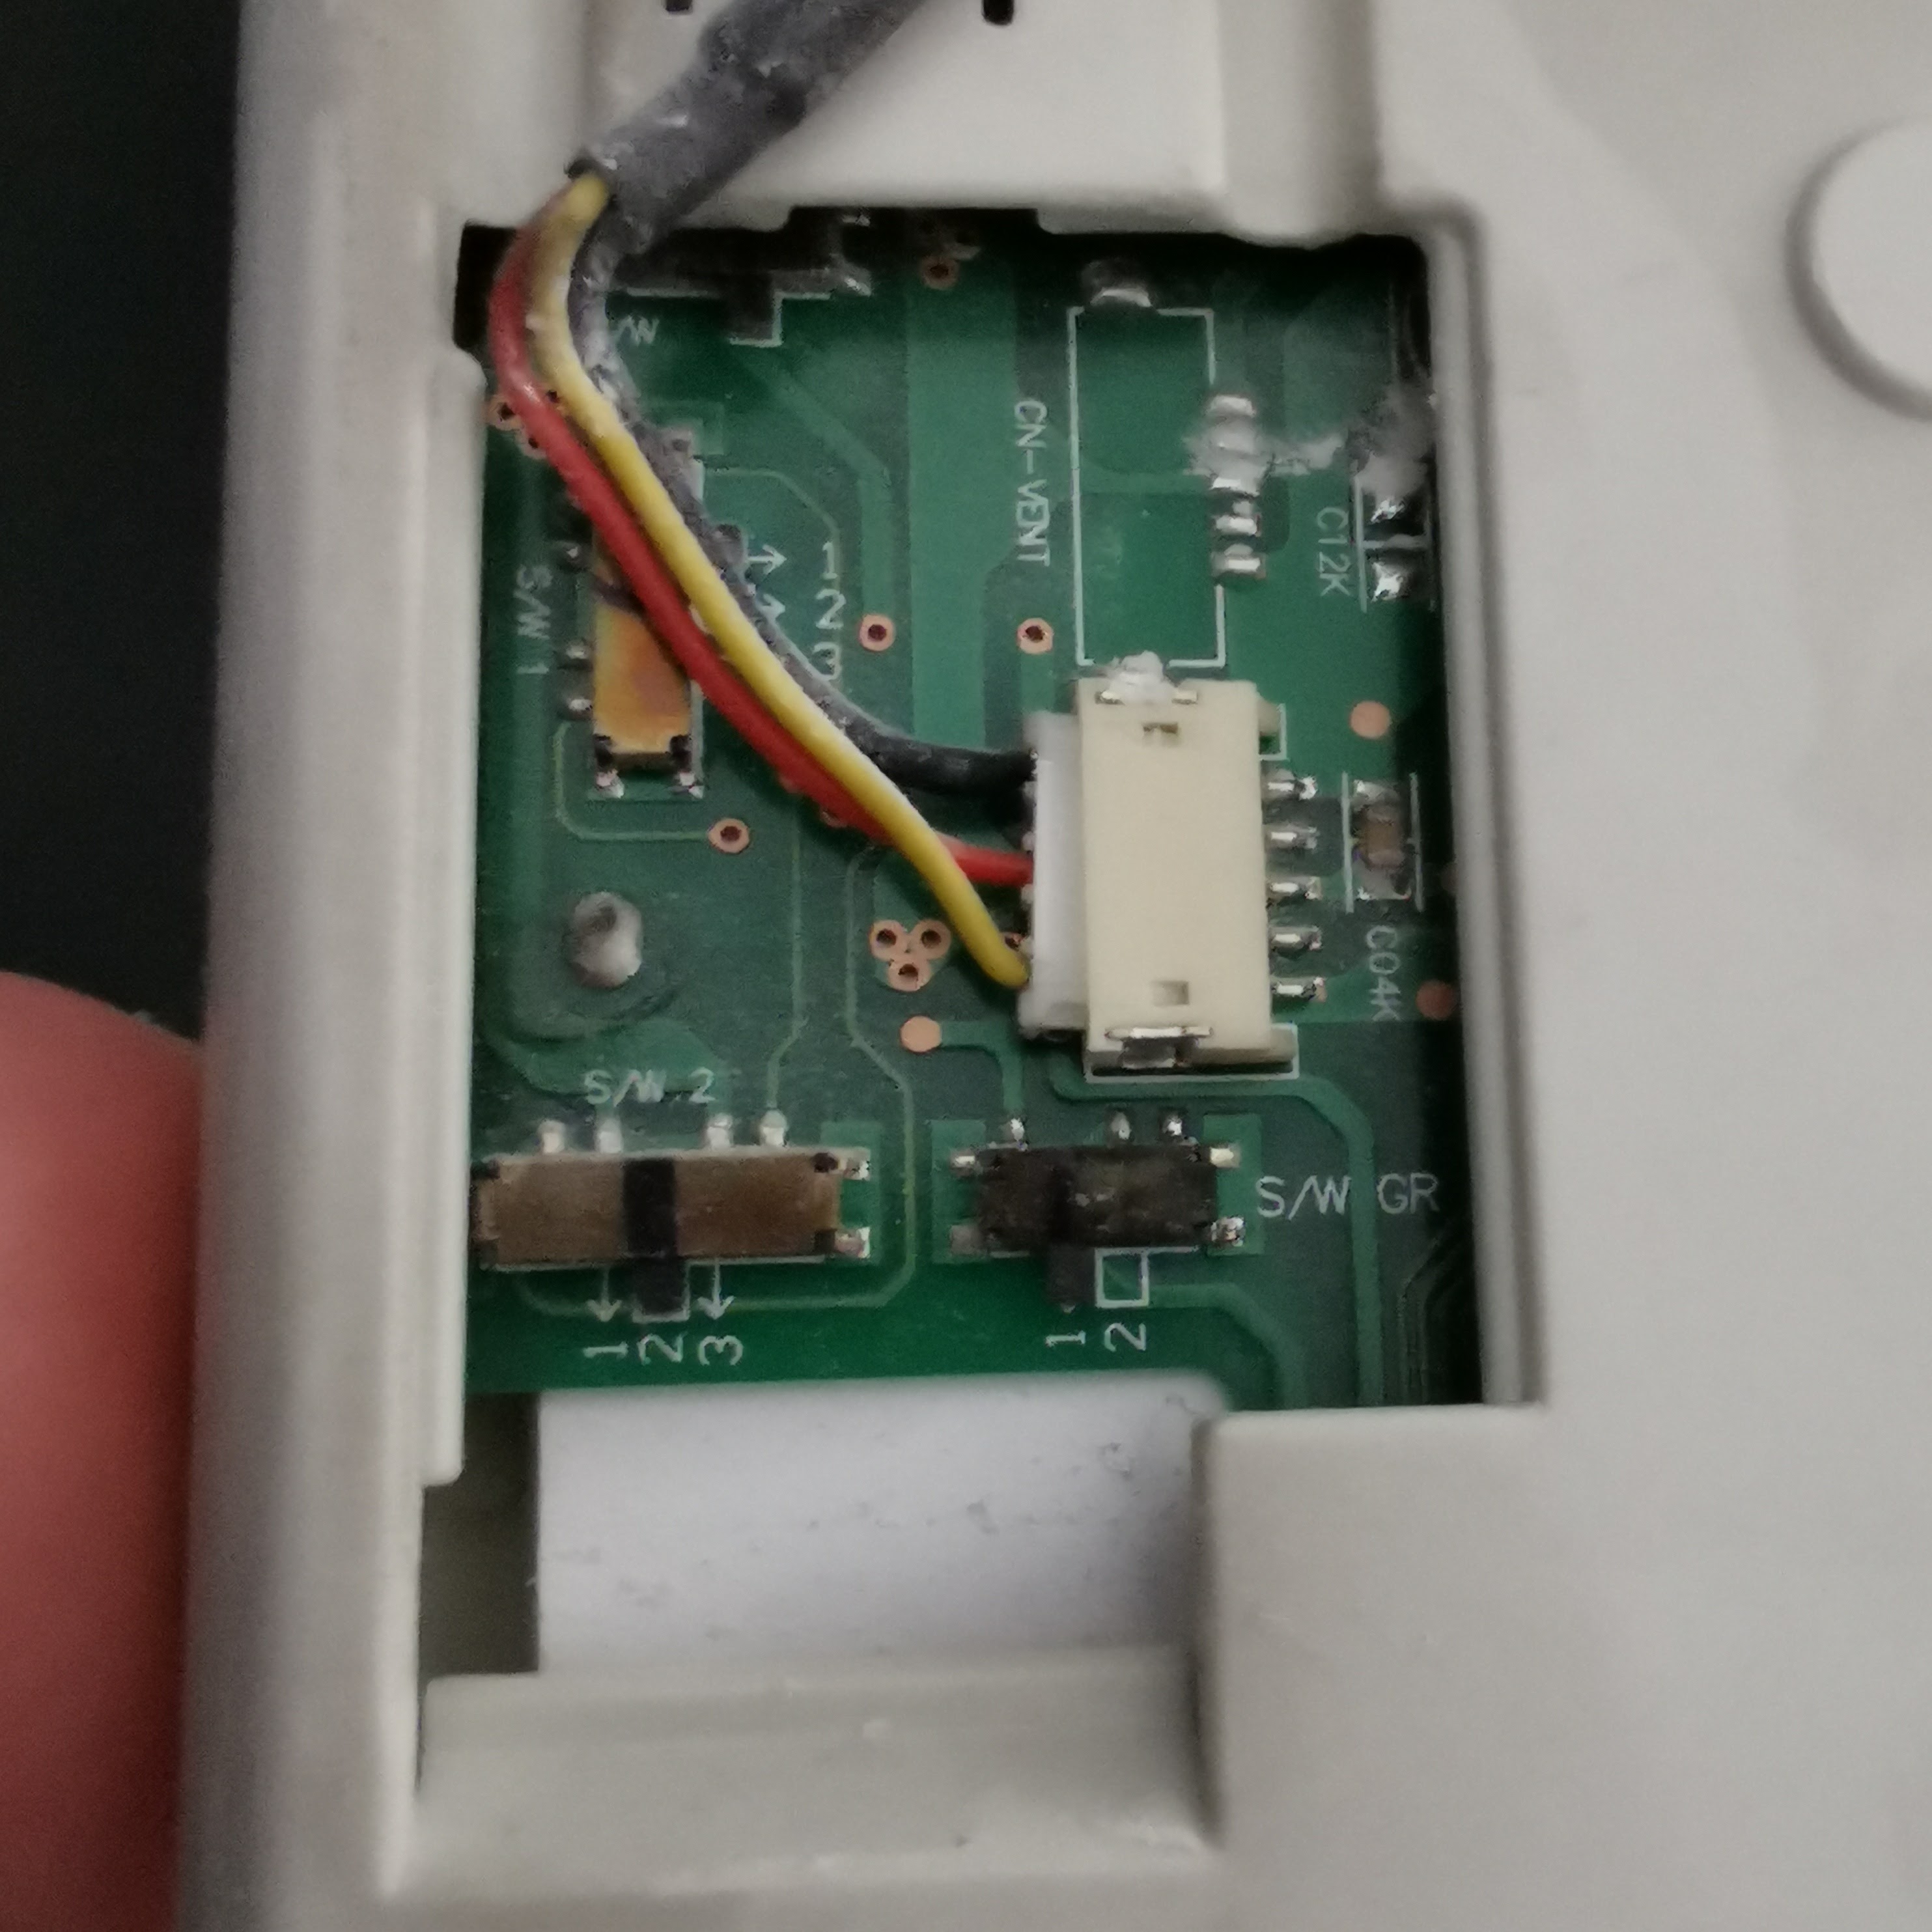
The first question is going to be what the electrical “protocol” it’s using. The back of the panel has a door, that hides the inbound connection from “the wall” (that is, the actual HVAC unit), which is three wires and terminates in a JST ZR connector.
With my multimeter I could confirm that the voltage would be around 12V — but I couldn’t confirm whether it would be differential data or what else, since I’m still using an older multimeter and it doesn’t have any option to indicate there’s a signal on a wire. If someone has a good suggestion for a multimeter that does that, please leave a comment below the video in this post as I’d love to get a good one.
Now this is a good news, overall. The fact that the plug, and the cable itself, can be bought off the shelf means I don’t have have to take risky approaches, which is great, given that we’re renting, so any reverse engineering and replacement implementation needed to be non-destructive and reversible.
So I took out my Logic Pro, a very long USB 3.0 cable, and I ordered just enough components from Digikey to debug this thing. And a bench power supply — because I didn’t have a bench power supply, and given this thing needed 12V, it sounded something handy to have for this. The end result is the following:
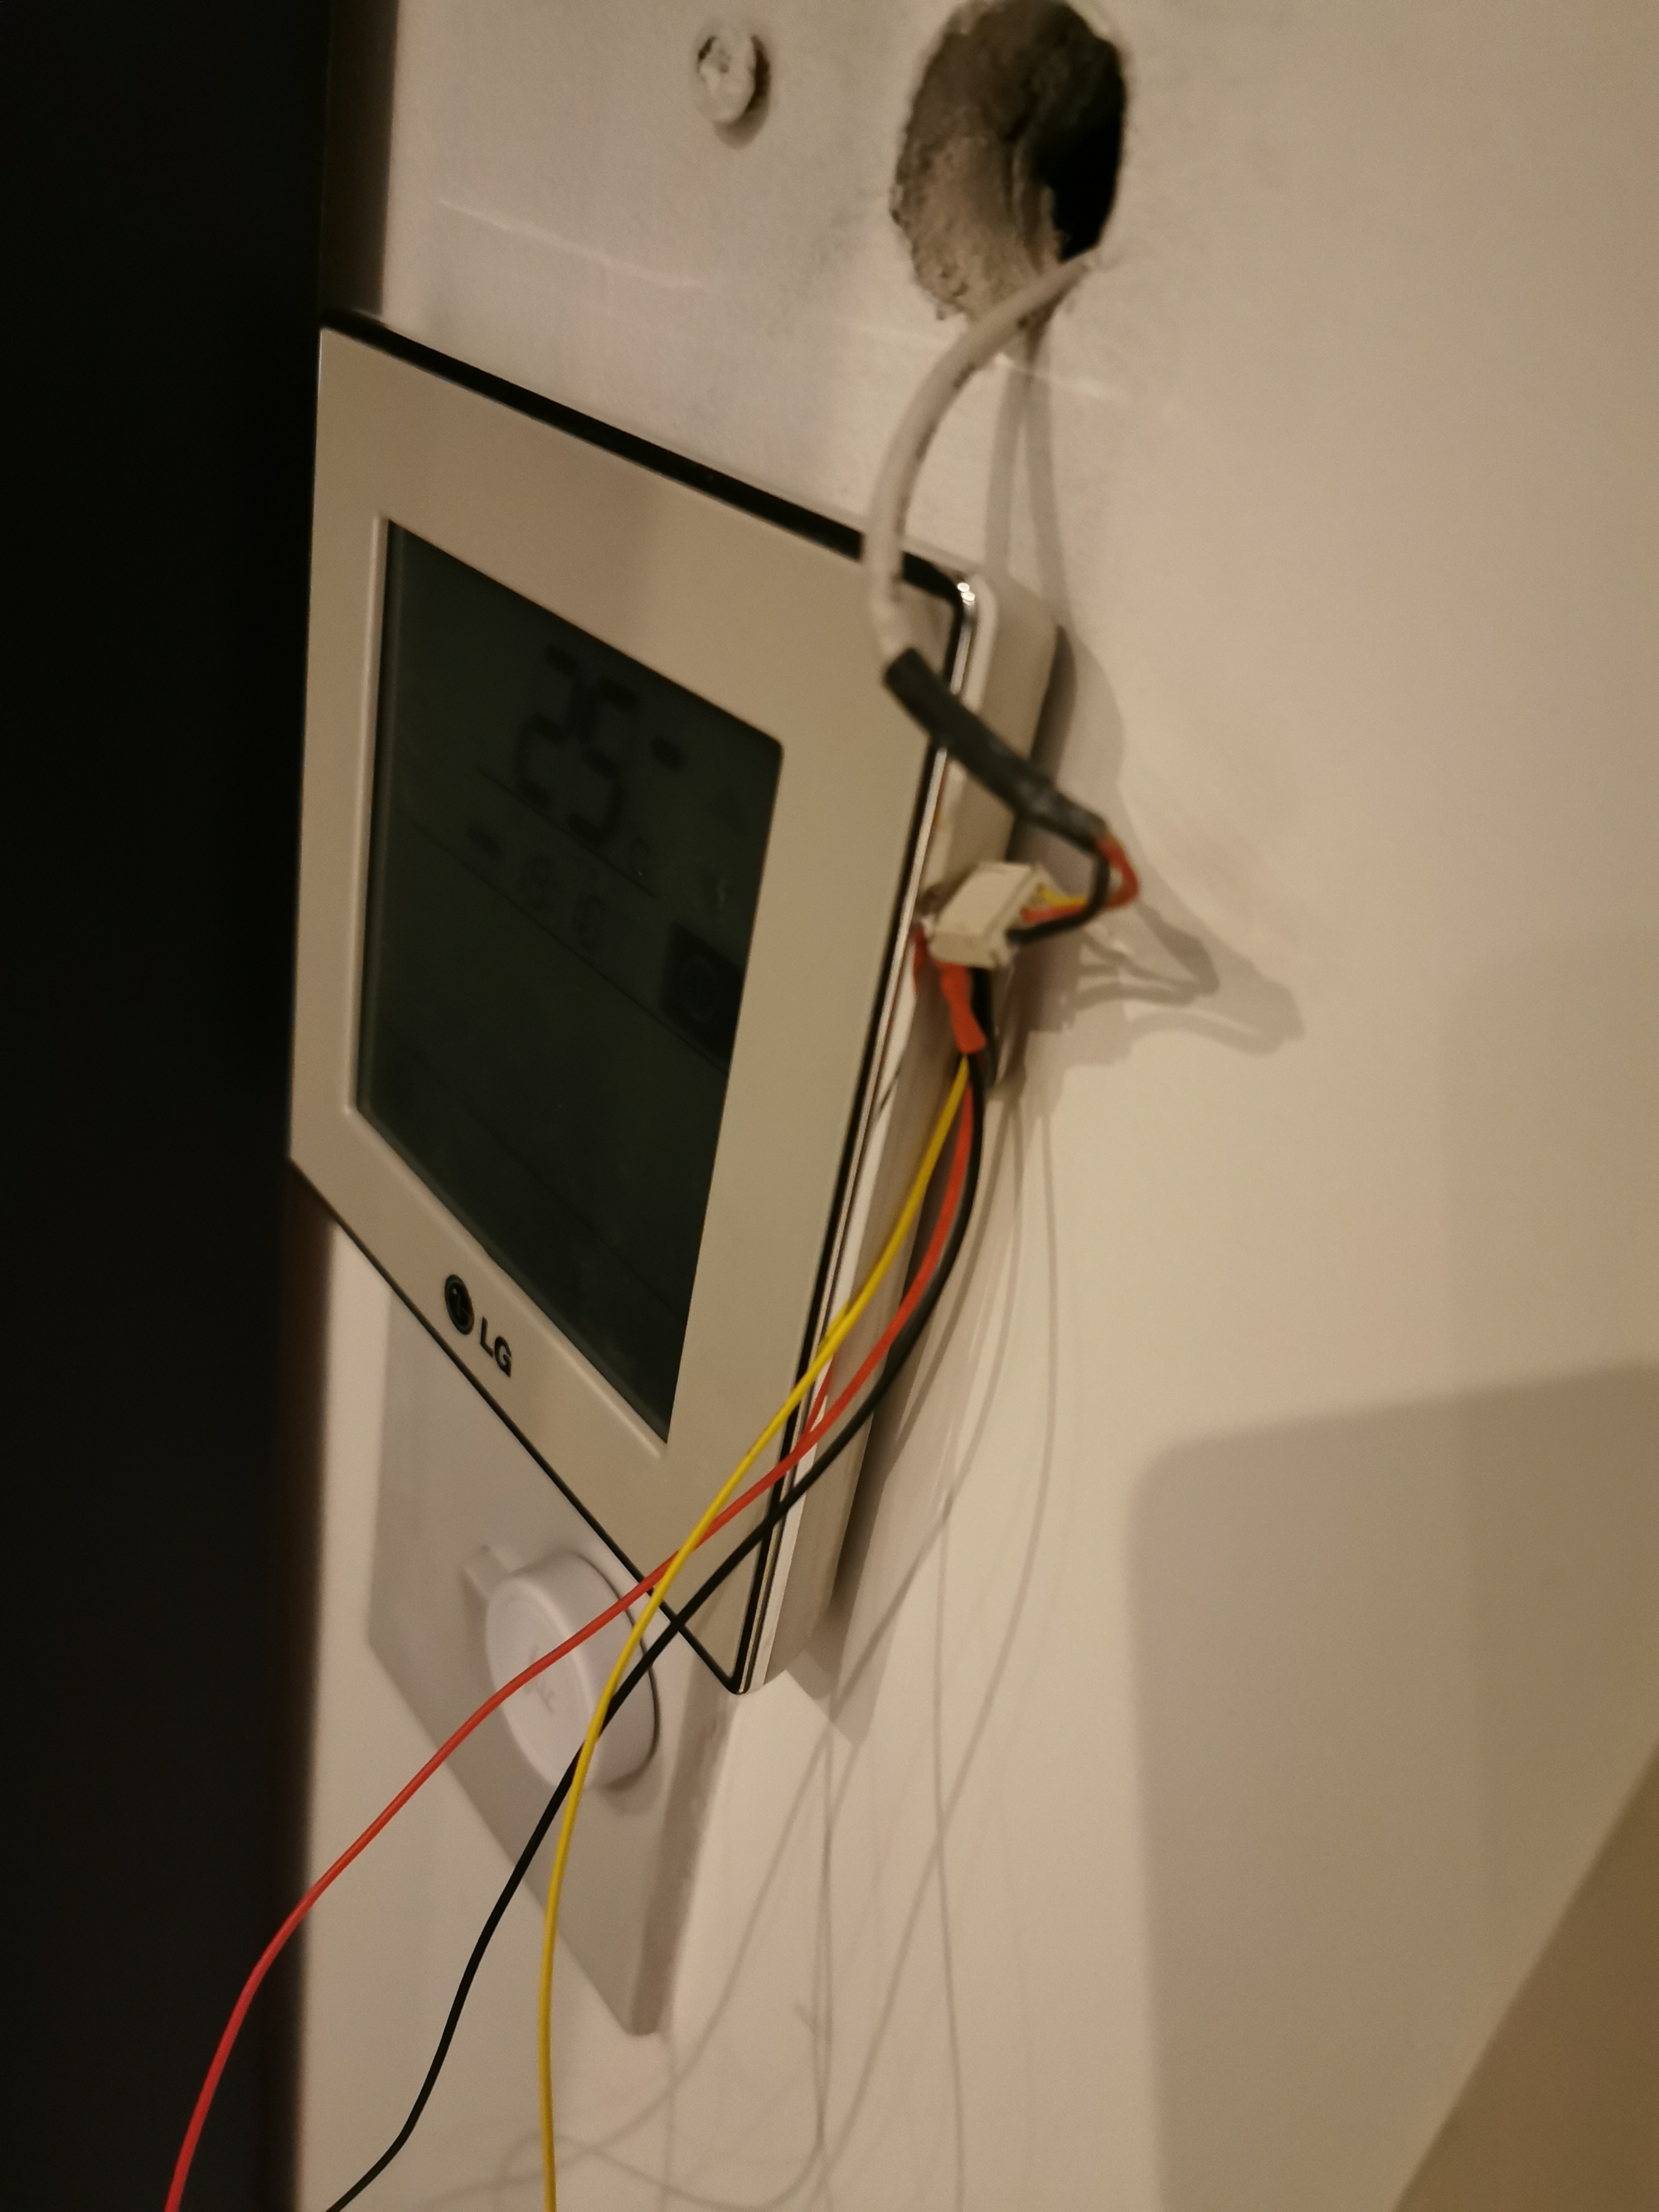
With this connected, I used the Logic 2 software to check the voltage levels, and figure out that the yellow wire is data, while the red wire (in the middle) is 12V supply. The data turned out to, indeed, be a 104 Bd serial connection, which would make it share a lot of the information from the previous reverse engineering…
Except that something was off: what I could see on the wire was a burst of 12 bytes in a single stream, exactly once a second, which I assumed at that point to be unidirectional from the panel to the HVAC. But when trying to verify the checksum it didn’t match what the instructions on the other project suggested: sum everything, modulo 256, and xor with 0x55 (the confusing ‘U’ in the various descriptions is actually a bit pattern). So while I could figure out that the first byte seemed to include the mode of operation, and the third one appeared to include the fan speed, I couldn’t figure out for the life of me the checksum, so I thought I wouldn’t be able to send commands to the HVAC to do what I wanted.
On the other hand, in the worst case scenario I could have just replayed the commands I could record from the panel, so I decided to try my luck at drawing and ordering a PCB that would have just enough components for me to play around with.
Drawing the PCB
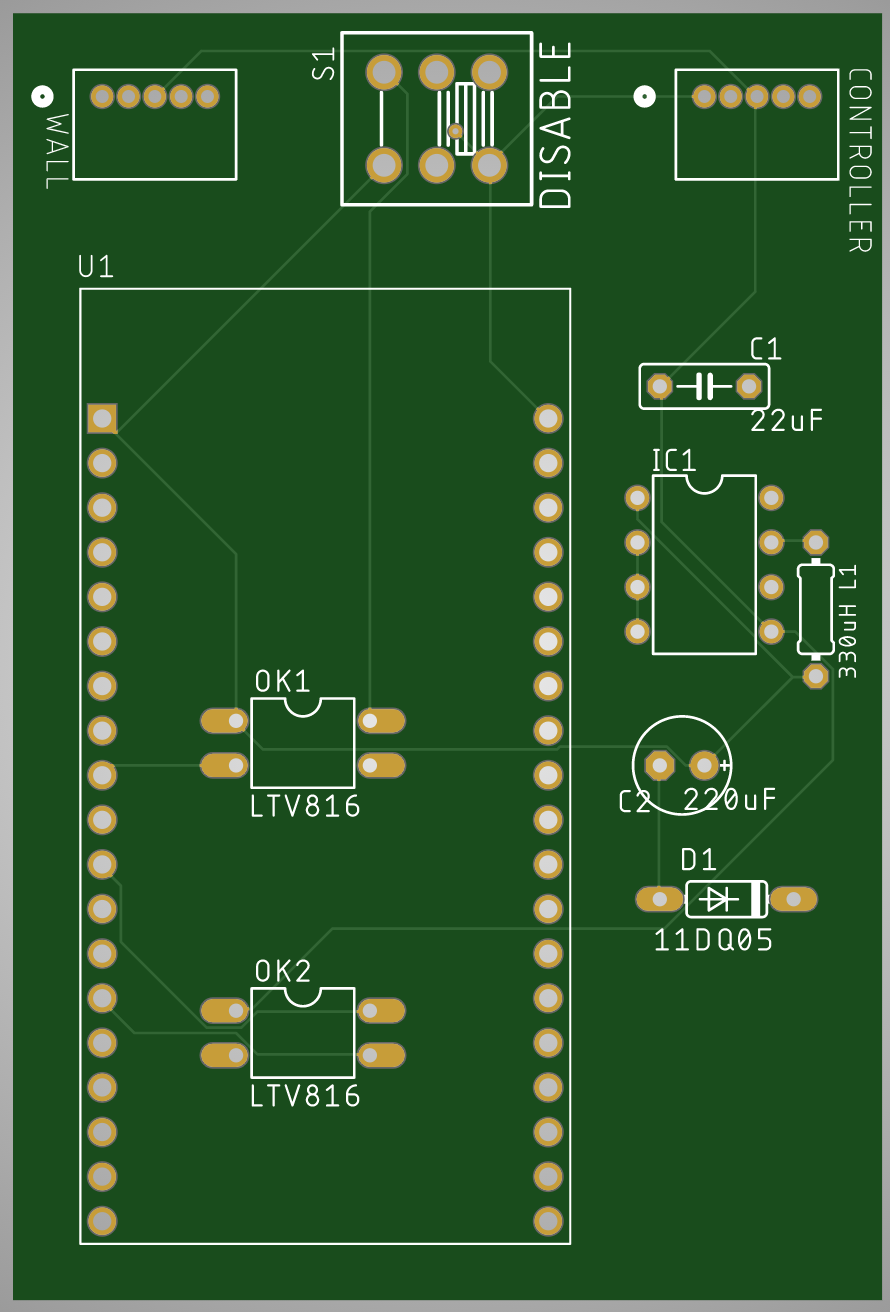
I’m far from being even a passable expert on electronics, but I could at least figure out some of the things I wanted from a “smart controller” unit to attach to this aircon. So I started with a list of requirements:
- Since I wanted it to use ESPHome, it should be designed around an ESP32 module. I already attempted this once with the acrylic lamps, and I have yet to get a working board out of that. On the other hand, this time I’m much less space constrained, so I decided to go for a full DEVKIT module, one of those with already the full board of regulators, USB port and serial adapters. This turned out to be a further blessing in disguise, since the current chip shortage appears to have affected the CP2104 module I used in my previous design and I wouldn’t have been able to replicate it.
- While I don’t expect that the HVAC power supply has been limited in power significantly (after all there’s even more deluxe WiFi enable controllers in other versions), I didn’t want to increase the load on the 12V supply significantly. Which meant I went for the more complex, but also more efficient, route of building in a buck converter to 3.3V to power up the ESP32.
- Also, I really know that relying on my code for “enjoyment-critical” use cases can be frustrating, I wanted a physical way to hard-disconnect a possibly misbehaving automation, and go back to use the old controller, without having to fidget with cables.
With these conditions, and the assumption that the twelve bytes I was seeing were being sent directly from the controller to the HVAC, I drew and manufactured the above board. Feel free to spot the error at the top of the board, if you may.
Now, since JLCPCB turnaround is usually fairly fast, I went ahead and got that manufactured while I was still fighting with figuring out the checksum. So when the boards arrived and I populated them, I was planning on just keep changing settings to find more possible combinations of bytes to see how the checksum would behave.
And that’s when I found out I was very wrong in my assumption, and it’s possible that either the reverse engineering notes I’ve seen for other are missing a big chunk of information, or LG has so many different ways to achieve roughly the same endgame. One I powered up the panel from the bench supply, then I could see that the panel was rather only sending six bytes, rather than the twelve I expected. It’s a bidirectional communication on a single wire, a bus.
That meant going back to the literal drawing board, find the right components to implement this, and start what turned out to be a much large sidequest of complicating matters.
I’m so keen to see where this goes. Standard AC controllers are most aggravating.