You may or may not know that I’m one of the few tech people who don’t seem to scream against IoT and I actually have quite a few “smart home” devices in my apartment — funnily enough, one less now that we don’t have normal heating at home and we had to give up the Nest Thermostat. One of the things that I have not set up until now was Home Assistant, simply because I didn’t really need anything from it. But when we moved to this flat, I felt the need to have some monitoring of humidity and temperature in the “winter garden” (a part of the flat that is next to the outside windows, and is not heated), since we moved up in floors and we no longer have the “repair” of being next to another building.
After talking with my friend Srdjan, who had experience with this, I settled on ordering Xiaomi-compatible “ClearGrass” CGG1 sensors from AliExpress. These are BLE sensors, which mean they can broadcast their readings without requiring active connections, and they have a nice eInk display, which wastes very little power to keep running. There’s other similar sensors, some cheaper in the short run, but these sounded like the right compromise: more expensive to buy, but cheaper to run (the batteries are supposed to last six months, and cost less than 50p).
Unfortunately, getting them to work turned out to be a bit more complicated than either of us planned at the beginning. The sensors arrived on a day off, less than two weeks after ordering (AliExpress is actually fairly reliable when ordering to London), and I spent pretty much the whole day, together with Srdjan over on videocall, to get them to work. To save this kind of pain for the next person who come across these issues, I decided to write this up.
Hardware Setup Advices
Before we dig into the actual configuration and setup, let me point out a few things about setting up these devices. The most annoying part is that the batteries are, obviously, isolated to avoid running out in shipping, but the “pull out tab” doesn’t actually pull out. It took quite a bit of force to turn the battery compartment door, open it up, and then re-set it in. Be bold in taking them out.
The other advice is not from me but from Srdjan: write the MAC address (or however it’s called in Bluetooth land) on each of the sensors. Because if you only have one sensor, it’s very easy to tell which one it is, but if you bought more (say, four like I did), then you may have issues later to identify which one is which. So it’s easier to do while you’re setting them up, by turning them on one at a time.
To tell what’s the address, you can either use an app like Beacon Simulator, and listen to the broadcast, or you can wait until you get to a point when you’re ready to listen to the broadcast, later in the process. I would recommend the former, particularly if you live in a block of flats. Not only there’s a lot of stuff that broadcast BLE beacons, but nowadays pretty much every phone is broadcasting them as well due to the Covid 19 Exposure Notifications.
And to make sure that you don’t mix them up, I definitely suggest to use a label maker — and if you are interested in the topic, make sure to check out the Museum of Curiosity Series 13, Episode 6.
Finally, there’s a bit of a spoiler of where this whole process is going to end up going to — I’m going to explicitly suggest you avoid using USB Bluetooth dongles, and instead get yourself an ESP32 kit of some kind. ESP32 devkits are less than £10 on Amazon at the time of writing, and you can find them even cheaper on AliExpress — and they will be much more useful, as I’ll go ahead and tell you.
Home Assistant Direct Integration
So first of all, we spent a lot of time mucking around with the actual Home Assistant integrations. There’s a mitemp_bt sensor integration in Home Assistant, but it’s an “active” Bluetooth implementation, that is (supposedly) more power hungry, and require associating the sensors with the host running Home Assistant. There’s also an alternative implementation, that is supposed to use passive BLE scans.
Unfortunately, even trying to install the alternative implementation turned out to be annoying and difficult — the official instructions appears to expect you install another “store-like” interface on top of Home Assistant, which appears to not be that easy to do when you use their “virtual appliance” image in the first place. I ended up hacking it up a bit, but got absolutely nothing out of it: there isn’t enough logging to know what’s going on at any time, and I couldn’t tell if any packet was even received and parsed.
There is also a clear divergence between the Home Assistant guidelines on how to build new integration, and the way the alternative implementation is written — one of the guides (which I can’t now find easily, and that might speak to the reason for this divergence) explicitly suggests not to write complex parsing logic in the integration, and instead build an external Python library to implement protocols and parsers. This is particularly useful when you want to test something outside of Home Assistant, to confirm it works first.
In this case, having a library (and maybe a command line tool for testing) would have made it easier to figure out if the problem with the sensors was that nothing was received, or that something was wrong with the received data.
This was made more annoying too by the fact that for this to work, you need a working Bluetooth adapter connected to your Home Assistant host — which in my case is a virtual machine. And the alternative implementation tells you that it might interfere with other Bluetooth integrations, so you’re suggested to keep multiple Bluetooth interfaces, one for each of the integrations.
Now this shouldn’t be too hard, but it is: the cheapest Bluetooth dongles I found on Amazon are based on Realtek chipsets, which while supported by (recent enough) Linux kernels, need firmware files. Indeed the one dongle I got requires Linux 5.8 or later, or it requests the wrong firmware file altogether. And there’s no way to install firmware files in the Home Assistant virtual appliance. I tried, quite a few times by now.
ESPHome Saves The Day
ESPHome is a project implementing firmware (or firmware building blocks, rather) for ESP8266 and ESP32 boards and devices, that integrates fairly easily with Home Assistant. And since ESP32 supports BLE, ESPHome supports Xiaomi-compatible BLE sensors, such as the CGG1. So the suggestion from Srdjan, which is what he’s been doing himself, is to basically use an ESP32 board as a BLE-to-WiFi bridge.
This was easy because I had a bunch of ESP32 boards in a box from my previous experiments with acrylic lamps, but as I said they are also the same price, if not cheaper, than Bluetooth dongles. The one I’m using is smaller than most breadboard-compatible ESP32 boards and nearly square — it was a cheap option at the time, but I can’t seem to find one available to build now. It’s working out well by size, because it also doesn’t have any pin headers soldered, so I’m just going to double-side-tape it to something and give it a USB power cable.
But it couldn’t be as easy as to follow the documentation, unfortunately. While configuring the ESPhome is easy, and I did manage to get some readings almost right away, I found that after a couple of minutes, it would stop seeing any signal whatsoever from any of the sensors.
Digging around, I found that this was not uncommon. There’s two ESPhome issues from 2019: #317 and #735 that report this kind of problems, with no good final answer on how to solve them, and unfortunately locked to collaborators, so I can’t leave breadcrumbs for the next person in there — and it’s why I am now writing this, hopefully it’ll save headaches for others.
The problem, as detailed in #735, is that the BLE scan parameters need to be adjusted to avoid missing the sensors’ broadcasts. I tried a few combinations, and at the end found that disabling the “active” scan worked — that is, letting the ESP32 passively listen to the broadcasts, without trying to actively scan the Bluetooth channels seemed to let it stay stable, now for over 24 hours. And it should also be, as far as I can tell, less battery-draining.
The final configuration looks something like this:
esp32_ble_tracker:
  scan_parameters:
    duration: 300s
    window: 48ms
    interval: 64ms
    active: False

sensor:
  - platform: xiaomi_cgg1
    mac_address: "XX:XX:XX:XX:XX:XX"
    temperature:
      name: "Far Corner Temperature"
    humidity:
      name: "Far Corner Humidity"
    battery_level:
      name: "Far Corner Battery Level"
The actual scan parameters should be, as far as I can tell, ignored when disabling the active scan. But since it works, I don't dare to touch it yet. The code in ESPhome doesn't make it very clear if changing those parameters when disabling active scan is entirely ignored, and I have not spent enough time going through the deep stack to figure this out for certain.
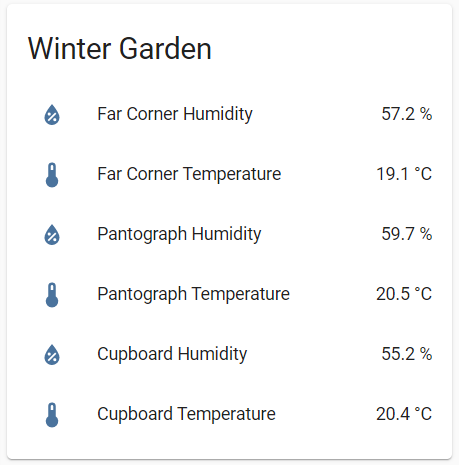
The only unfortunate option of having it set up this way, is that by default, Home Assistant will report all of the sensors in the same "room", despite them being spread all over the apartment (okay, not all over the apartment in this case but in the winter garden).
I solved that by just disabling the default Lovelace dashboard and customizing it. Because turns out it's much nicer to customize those dashboards than using the default, and it actually makes a lot more sense to look at it that way.
Looking To The Future
So now I have, for the first time, a good reason to use Home Assistant and to play around with it a bit. I actually have interesting "connected home" ideas to go with it — but they mostly rely on getting the pantograph windows working, as they don't seem currently to be opening at all.
If I'm correct in my understanding, we'll need to get the building managers to come and fix the electronic controls, in which case I'll ask for something I can control somehow. And then it should be possible to have Home Assistant open the windows in the morning, assuming it's not raining and the temperature is such that a bit of fresh air would be welcome (which is most of the summer, here).
It also gives me a bit more of an incentive to finish my acrylic lamps work — it would be easy, I think, to use one of those as a BLE bridge that just happens to have a NeoPixel output channel. And if I'm going "all in" to wire stuff into Home Assistant, it would also allow me to use the acrylic lamps as a way to signal for stuff.
So possibly expect a bit more noise on this front from me, either here or on Twitter.
Update 2020-12-06: The sensors I wrote about above are an older firmware CGG1 sensors that don't use encryption. There appear to be a newer version out that does use encryption, and thus require extracting a bind key. Please follow the reported issue for updates.
Update 2021-06-26: I forgot to update this, but ESPHome 1.17.1 and later support encrypted CGG1 out of the box as my pull request was merged.
Total noob here to ESP32 and ESPHome, and my first project was to set one up to monitor these ClearGrass CGG1 sensors. I was celebrating until it seemed to stop sending data. Your post has saved the day! With your changes to the scan parameters I’m off to the races. Thanks for taking the time to write this up!
Thanks for the post.
I have the same issue with my esp32 working fine after boot, then only getting a value every 2 hours or so.
Will try your fix latter